Dashboard Administration
Data access control is ubiquitous in the Solar Forecast Arbiter. All users can benefit from a cursory understanding of the access control system. Organization administrators need a more thorough understanding to effectively and safely manage their data.
This section describes the key concepts, outlines the user interface, and provides several examples.
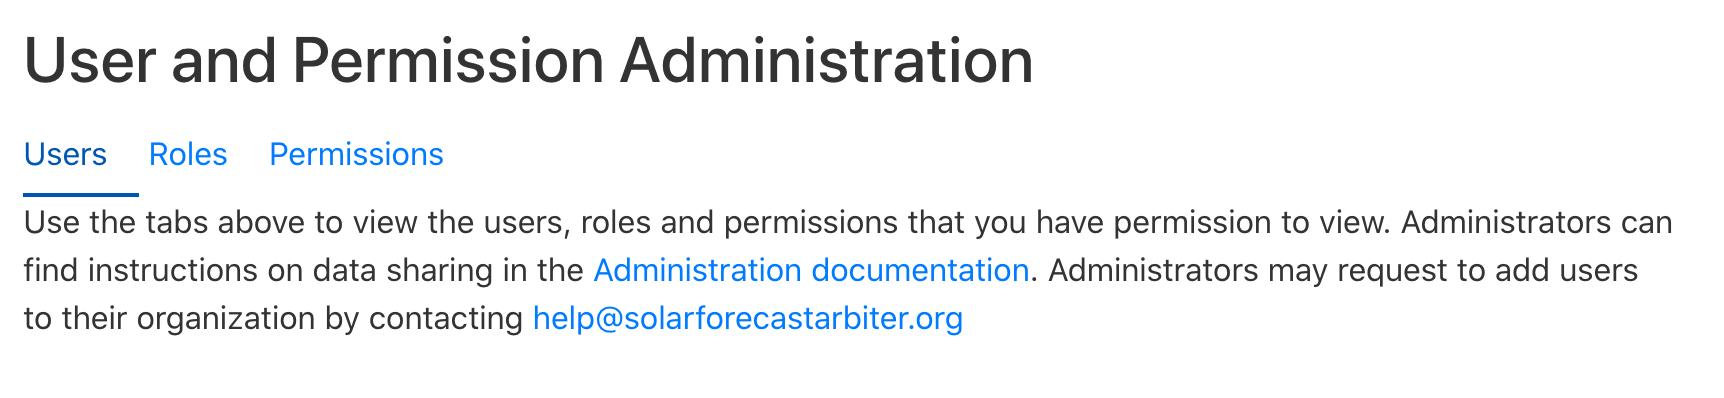
User, permission, and role administation can be accessed by clicking the User
Administration link in the Account menu in the top right corner of the site.
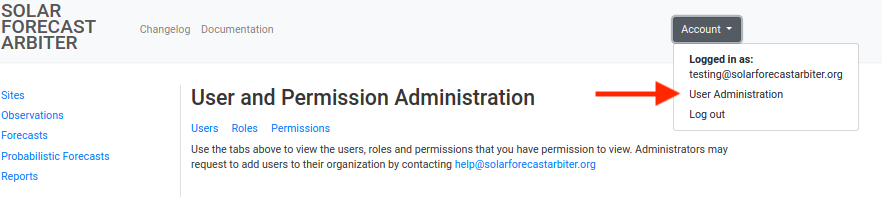
These pages allow organization administrators to view and manage permissions. Users without administrative privileges may not see anything on these pages.
Data types
When we talk about data access we often fail to distinguish between types of data. That’s sometimes ok for plain communication, but a good data control system requires precision.
Sites, Observations, Forecasts, Aggregates and Reports
Data access on a site only controls access to the site metadata (e.g. location, plant capacity). It does not control access to any observations, forecasts, or reports associated with that site.
Most users will already be familiar with observations and forecasts but note the data access on metadata is distinct from access on the time series values:
- Observation metadata (e.g. interval length)
- Observation time series values
- Forecast metadata (e.g lead time to start)
- Forecast time series values
- Probabilistic forecast metadata (e.g. fixed percentiles)
- Probabilistic forecast time series values
Reports are also comprised of metadata and values:
- Report metadata (e.g. start and end times, metrics selections)
- Report values (e.g. the metric values)
Aggregate values are dynamically computed and rely on access to the values of constituent observations. Metadata about the make up of an aggregate relies on access to the metadata constituent observations and their associated sites.
Organizations
Organizations are groups of users. All data submitted by users within an organization belong to that organization. An organization’s administrators control access to all of the data belonging to the organization. See Managing Organizations and Users for more information on organizations.
Users
Users are described by their user name and their organization affiliation. See User Classifications for more information on users.
Data About Data Access
The data types that support the access control system are:
- Permissions (e.g. read site Y and site Z metadata)
- Roles (e.g. share forecasts with utility X)
Role Based Access Control
Sharing data in the Solar Forecast Arbiter generally requires:
- Creating permissions for reading or modifying data.
- Grouping those permissions into roles.
- Granting those roles to one or more user names.
This pattern is known as Role Based Access Control. The next sections discuss permissions and roles in more detail.
Permissions
Permissions allow a user to perform a single action on one or more pieces of similar data within an organization. For instance, a permission may allow a user to view the metadata of two observations. Another permission may allow a user to view the time series data of those observations.
Permissions may also apply to all current and future pieces of similar data within an organization. For instance, a permission may allow a user to post values to all of an organization’s forecasts. If the organization defines a new forecast, it will automatically be included in this permission.
Permissions are added to roles to enable users with that role to perform the permission’s action. A permission can only allow actions on data owned by the organization in which it was created.
The Permissions Reference Table describes the full set of permissions.
Create New Permission
-
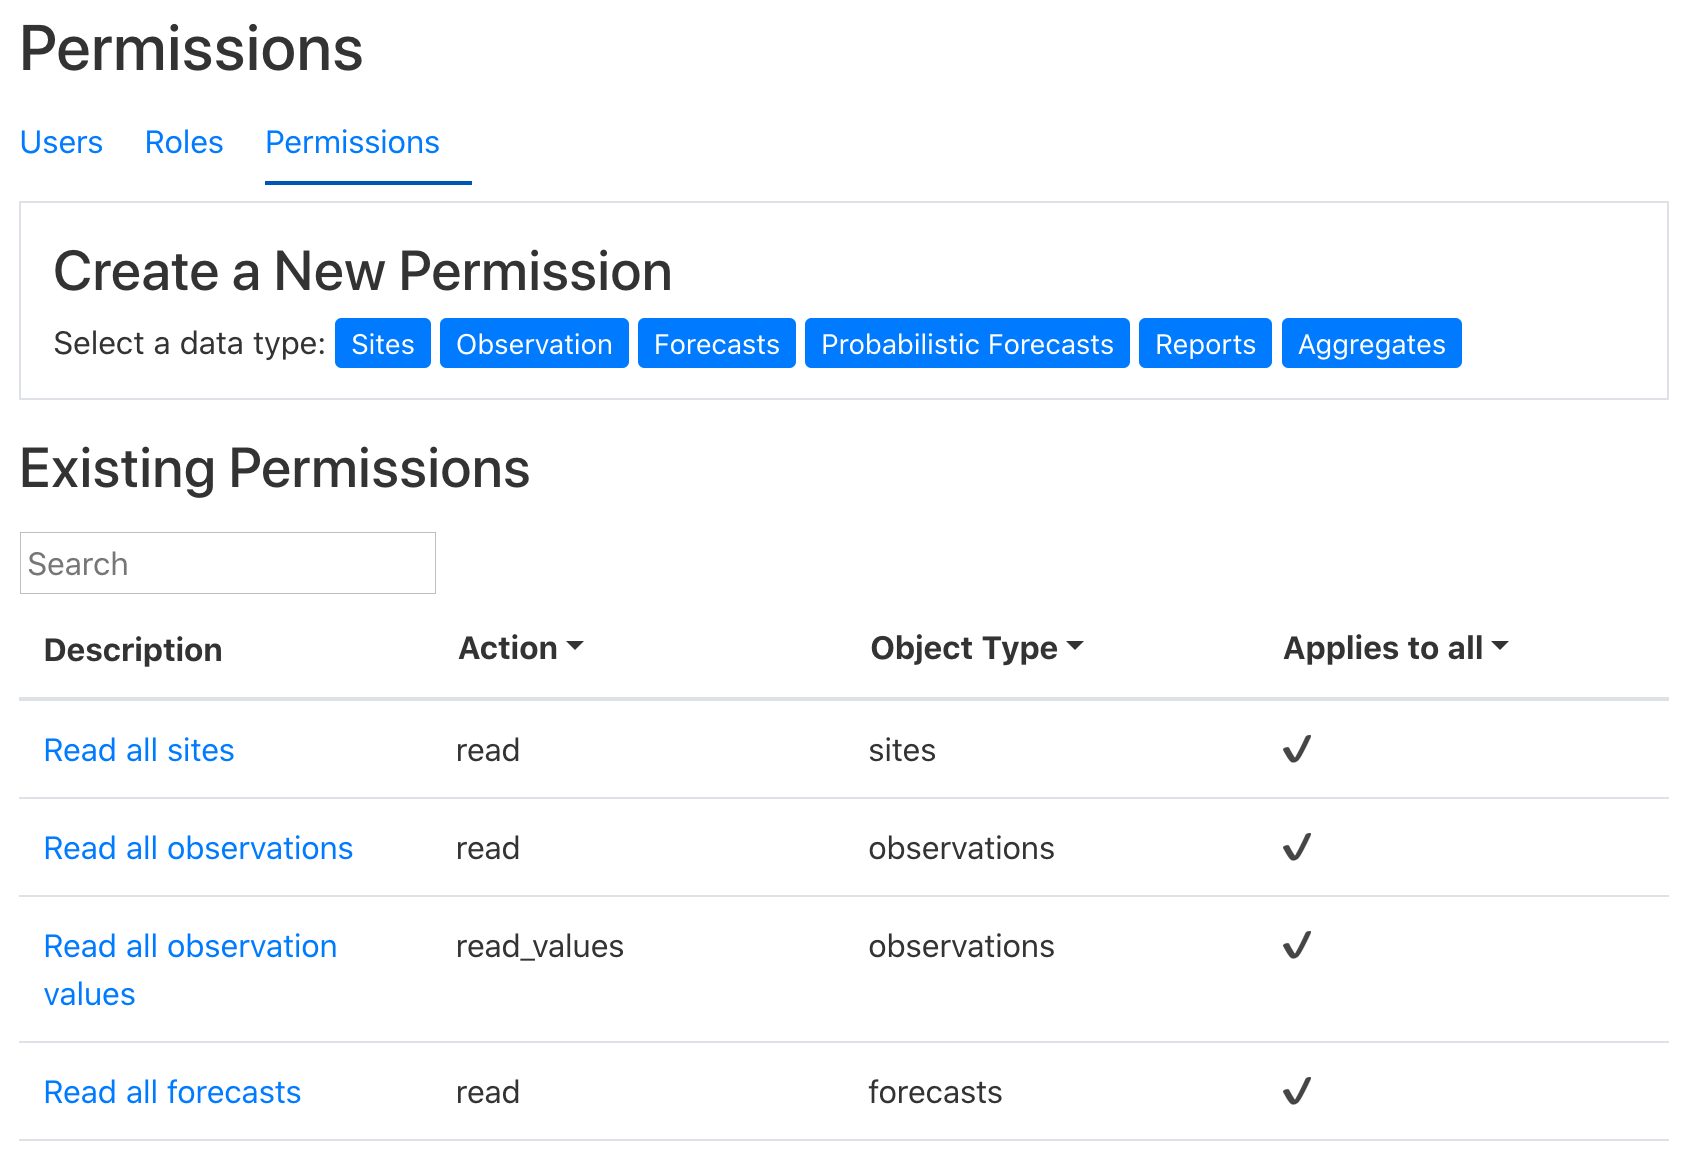
Navigate to the Permissions listing with the Permissions tab of the admin menu. This page will list all of the Permissions you have access to administer or view.
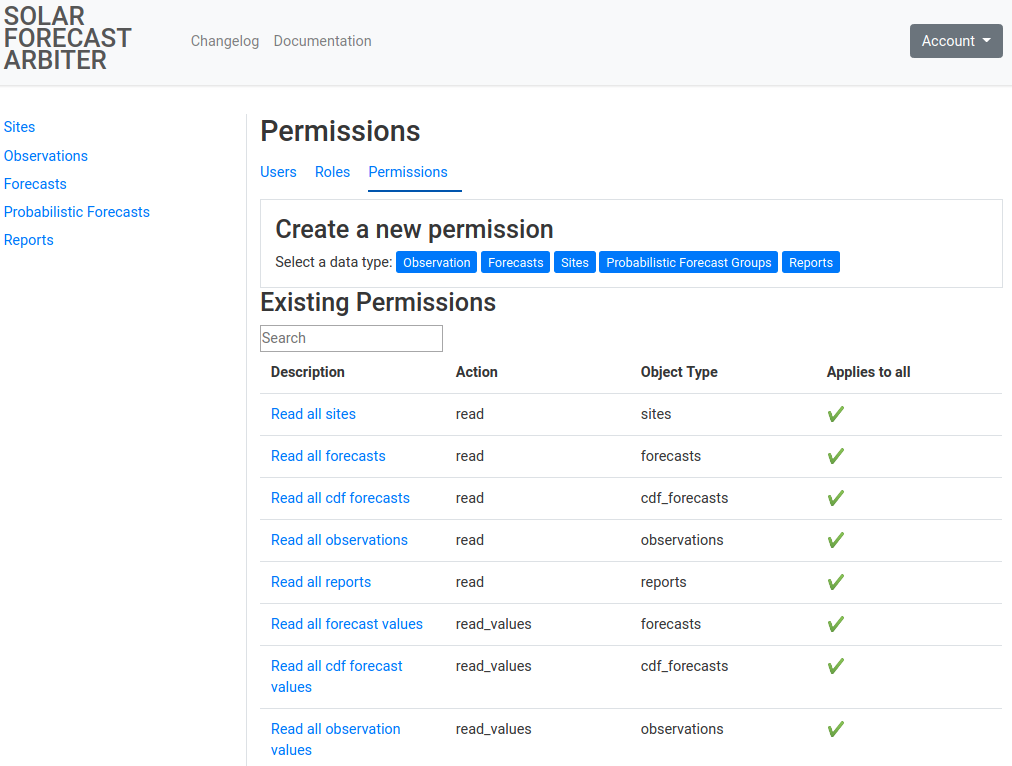
-
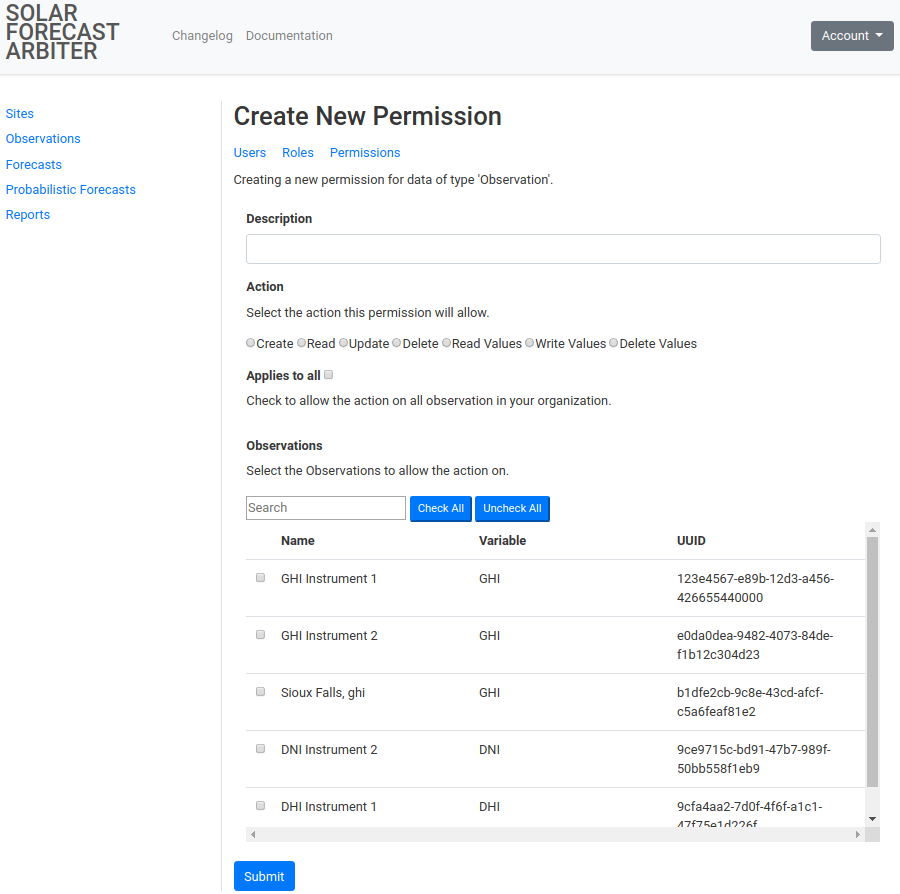
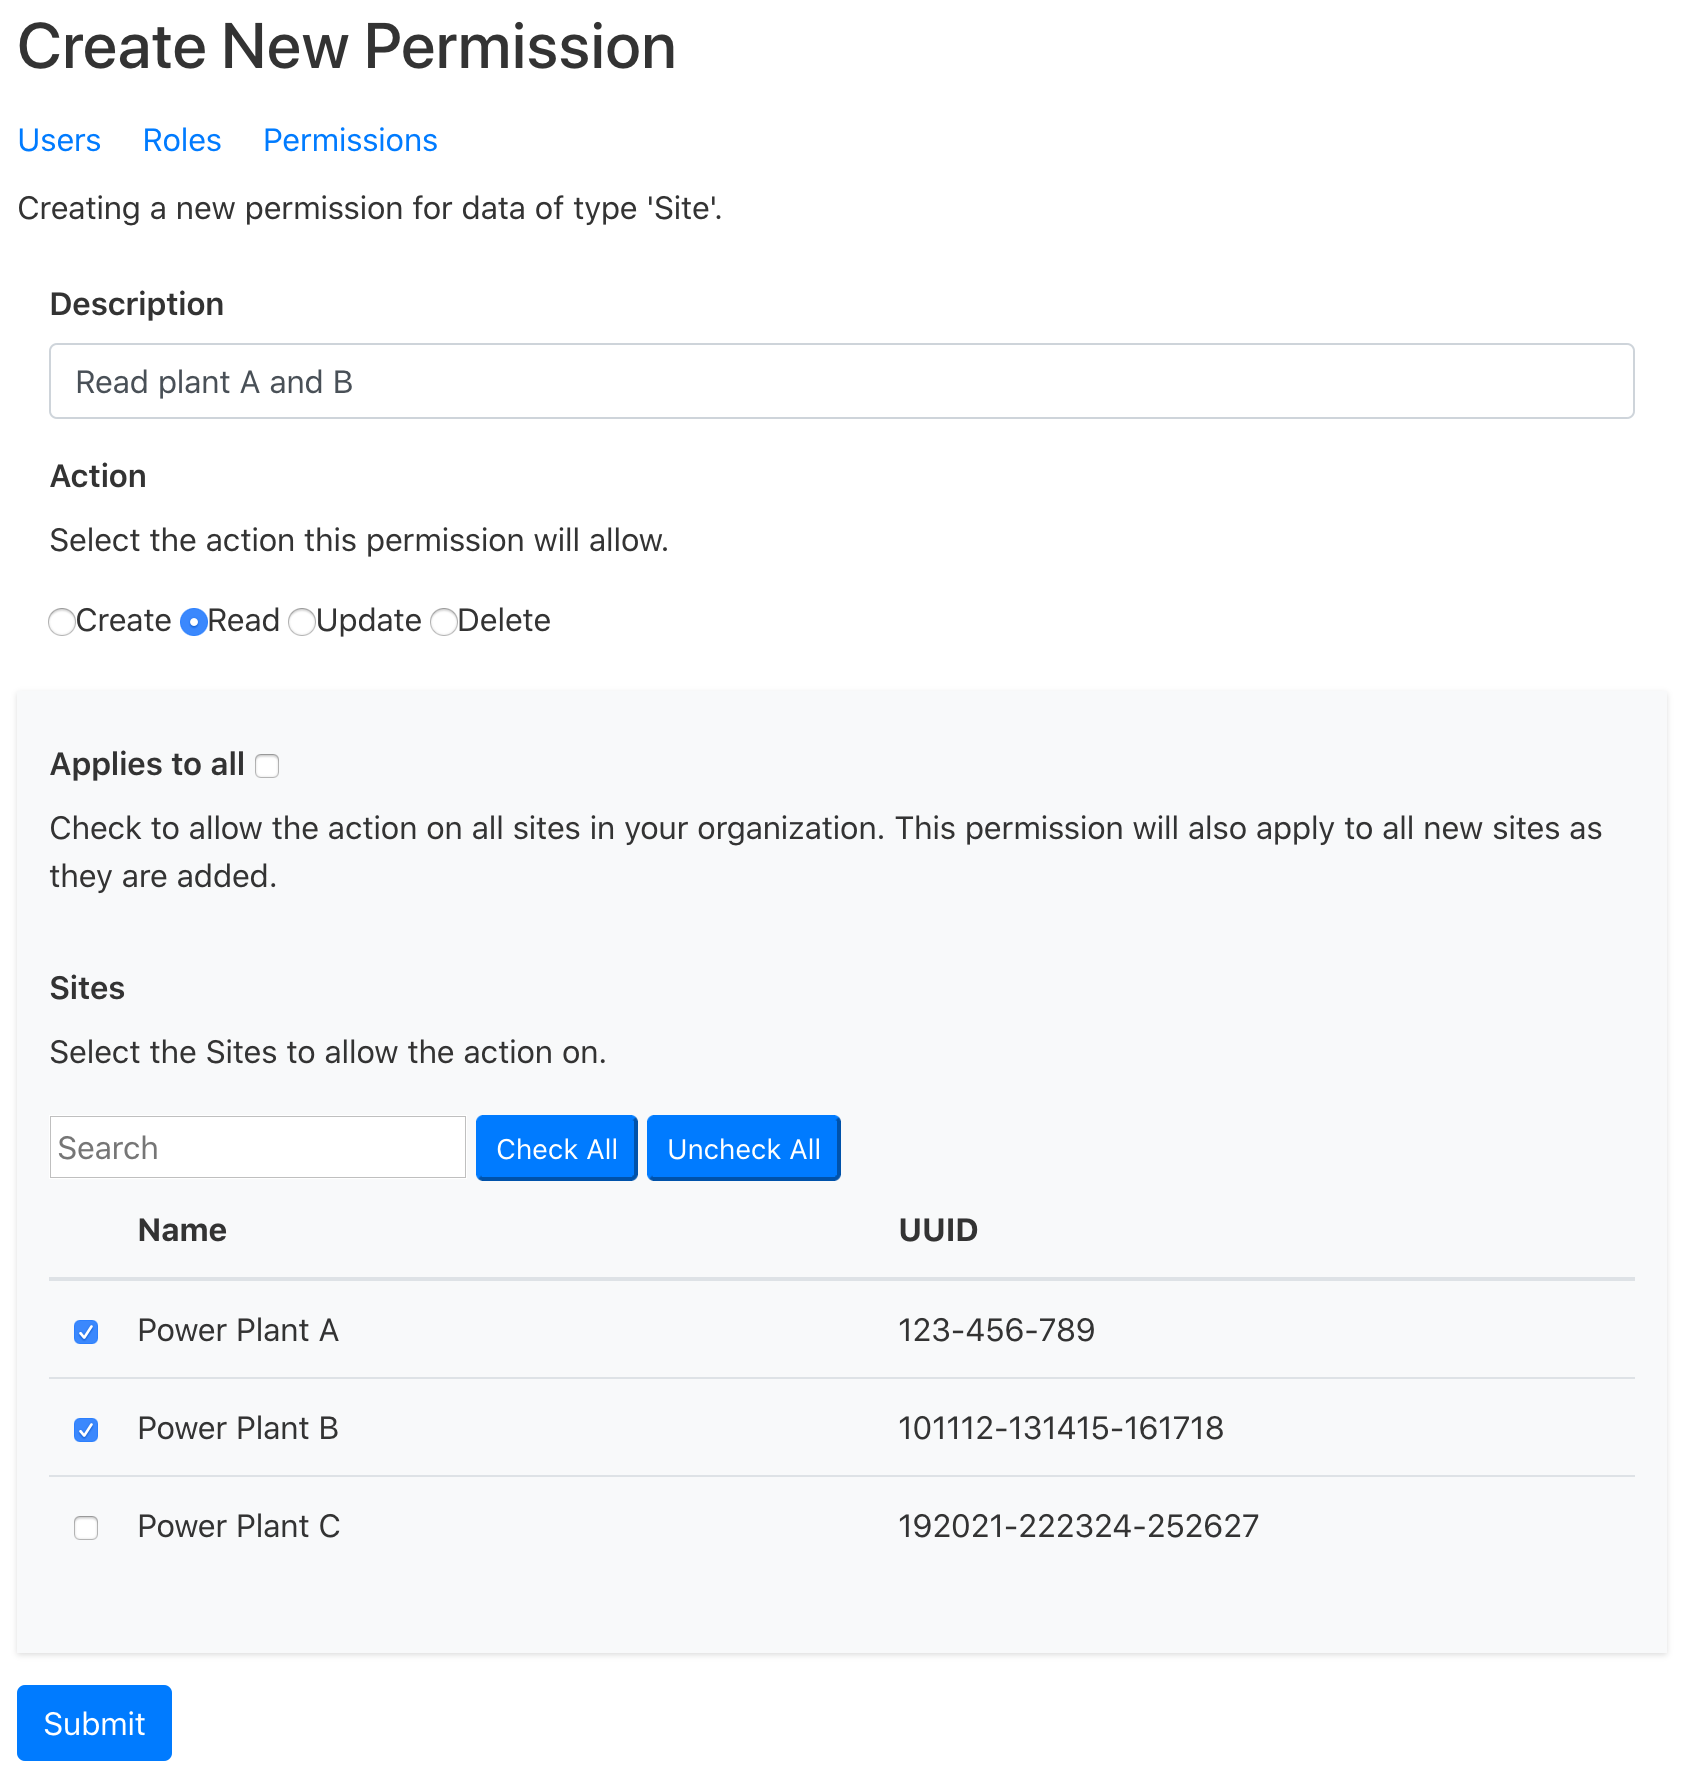
Click on the data type you would like to create a permission for in the “Create new Permission” box. You will be prompted for a description of the permission, the action the permission allows and a list of objects. Click the checkboxes for each object that the permission should allow its action on. Selecting Applies to all will cause the permission to affect all current and future objects of the permission’s type.
Permission form for observation permsission
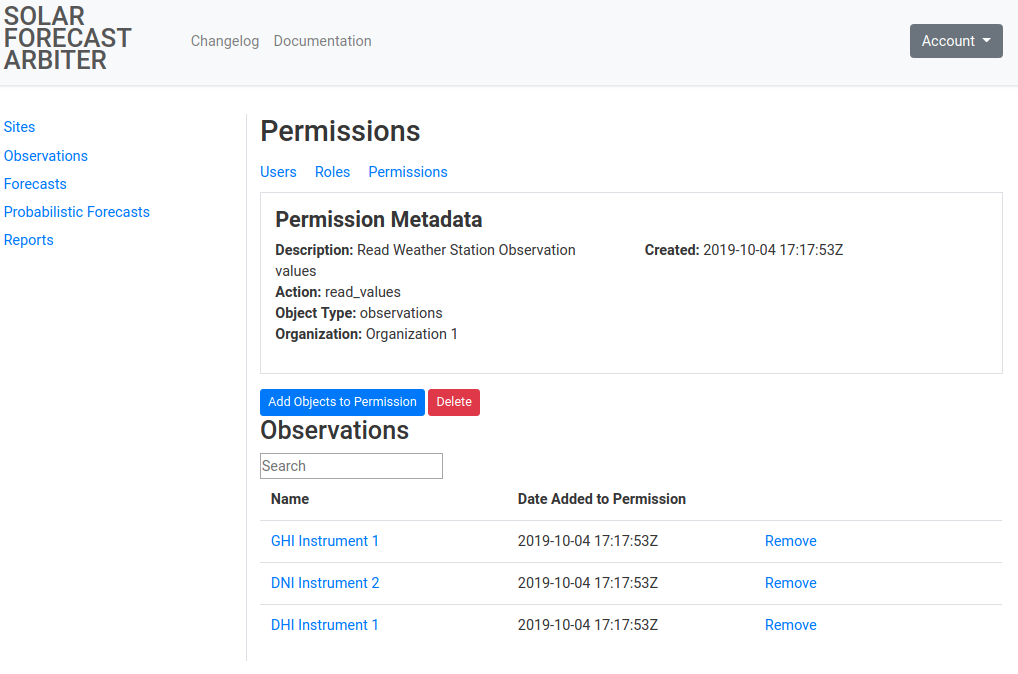
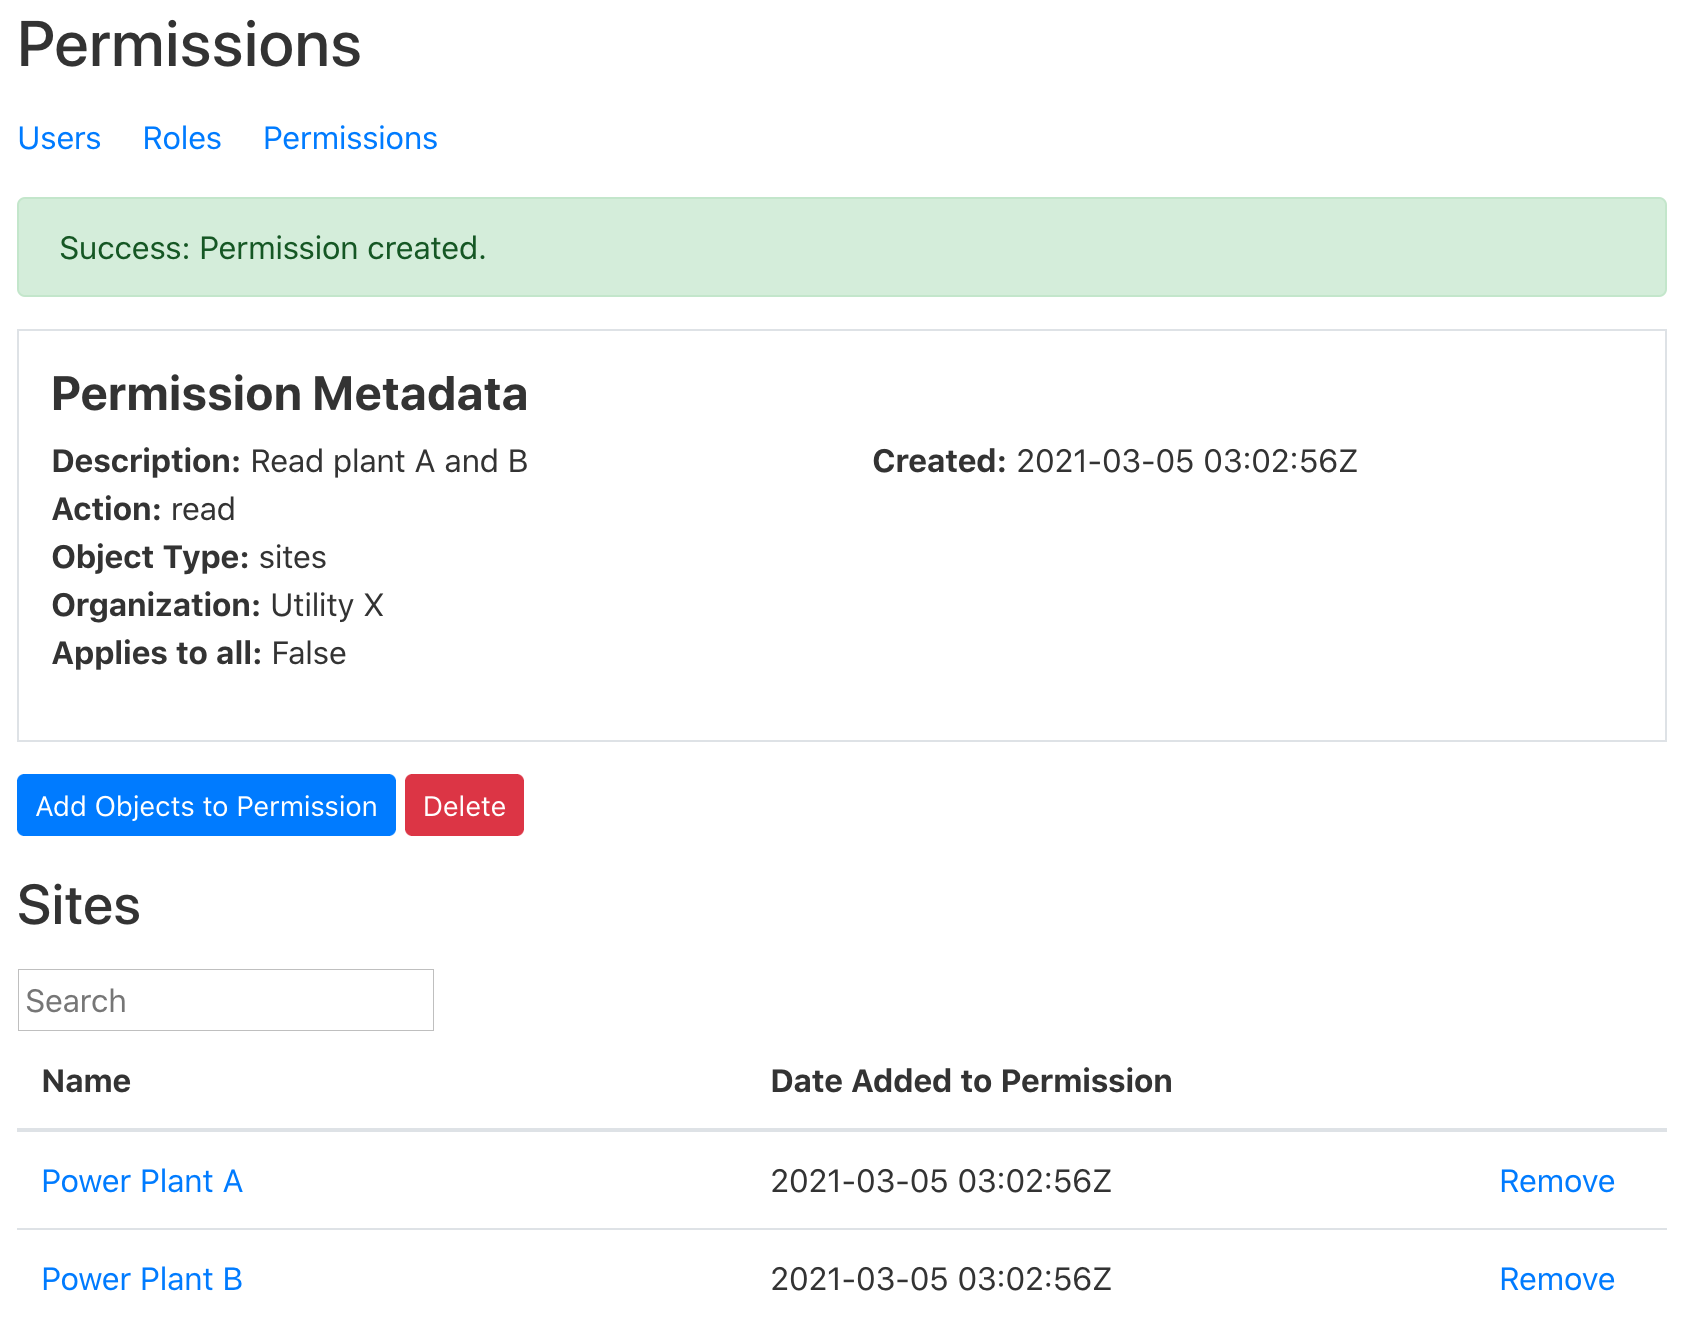
Clicking on an individual Permission will list information about it and the
objects it applies to.
Roles
Roles are a collection of permissions that may be granted to a user. Granting a role permits the user to perform actions defined by the role’s permissions.
Best practice is to only grant users the permissions necessary to perform their job function. For instance, an organization administrator’s roles will have permissions to create new roles and permissions, while a non-administrative user’s roles may only have permission to view and write data to the organization’s forecasts.
Roles may also be created to share data with users outside of the organization. For instance, a utility may create a role “Share with forecasters” that includes permissions for reading site metadata, observation metadata, and observation values.
Default Roles
When a new organization is created, a set of default roles is created for the organization. These roles are intended for use within the organization as they permit actions on all existing and future data in an organization. Administrators are encouraged to create new roles with permissions tailored to a specific user or group of users. When sharing data with users outside their organization, organization administrators are strongly encouraged to create roles with specific permissions that apply to only the data they would like to share.
The default roles are:
- View all data and metadata: Access all of the metadata and values in the organization. This includes observations, forecasts, probabilistic forecasts, sites, aggregates, and reports.
- Write all values: Allows a user to submit data within the organization e.g. adding measurements to an observation.
- Create metadata: Allows a user to create new sites, observations, forecasts, probabilistic forecasts, reports, and aggregates.
- Delete data and metadata: Allows a user to delete sites, observations, forecasts, probabilistic forecasts as well as any associated values.
-
Administer data access controls: Granted to organization administrators, this role allows:
- Create and delete new roles and permissions.
- Add and remove permissions from roles.
- Add or remove data objects from a permission.
- Grant and revoke roles on a user.
Create New Role
-
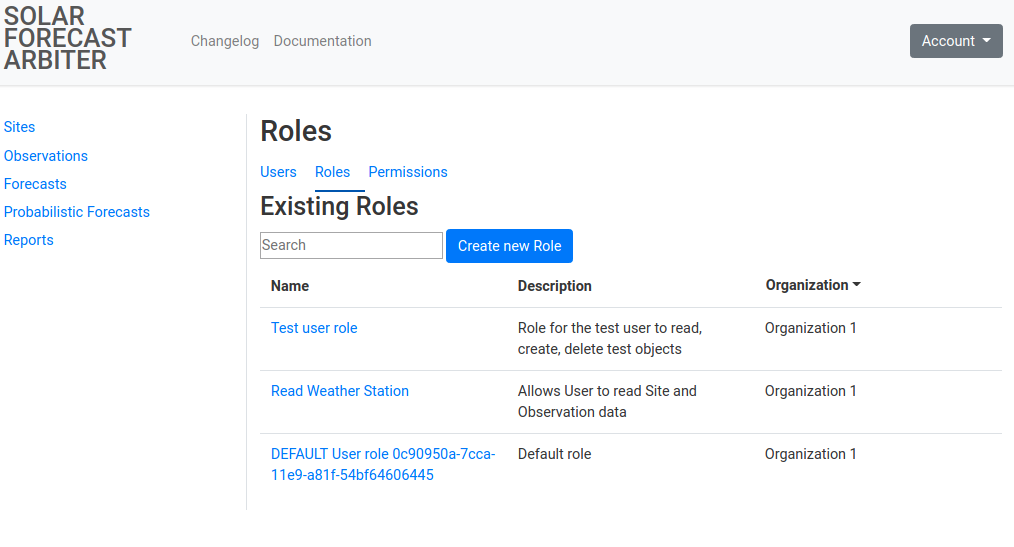
Navigate to the roles listing with the Roles tab of the admin menu. This page lists all of the Roles you have access to administer or view.
-
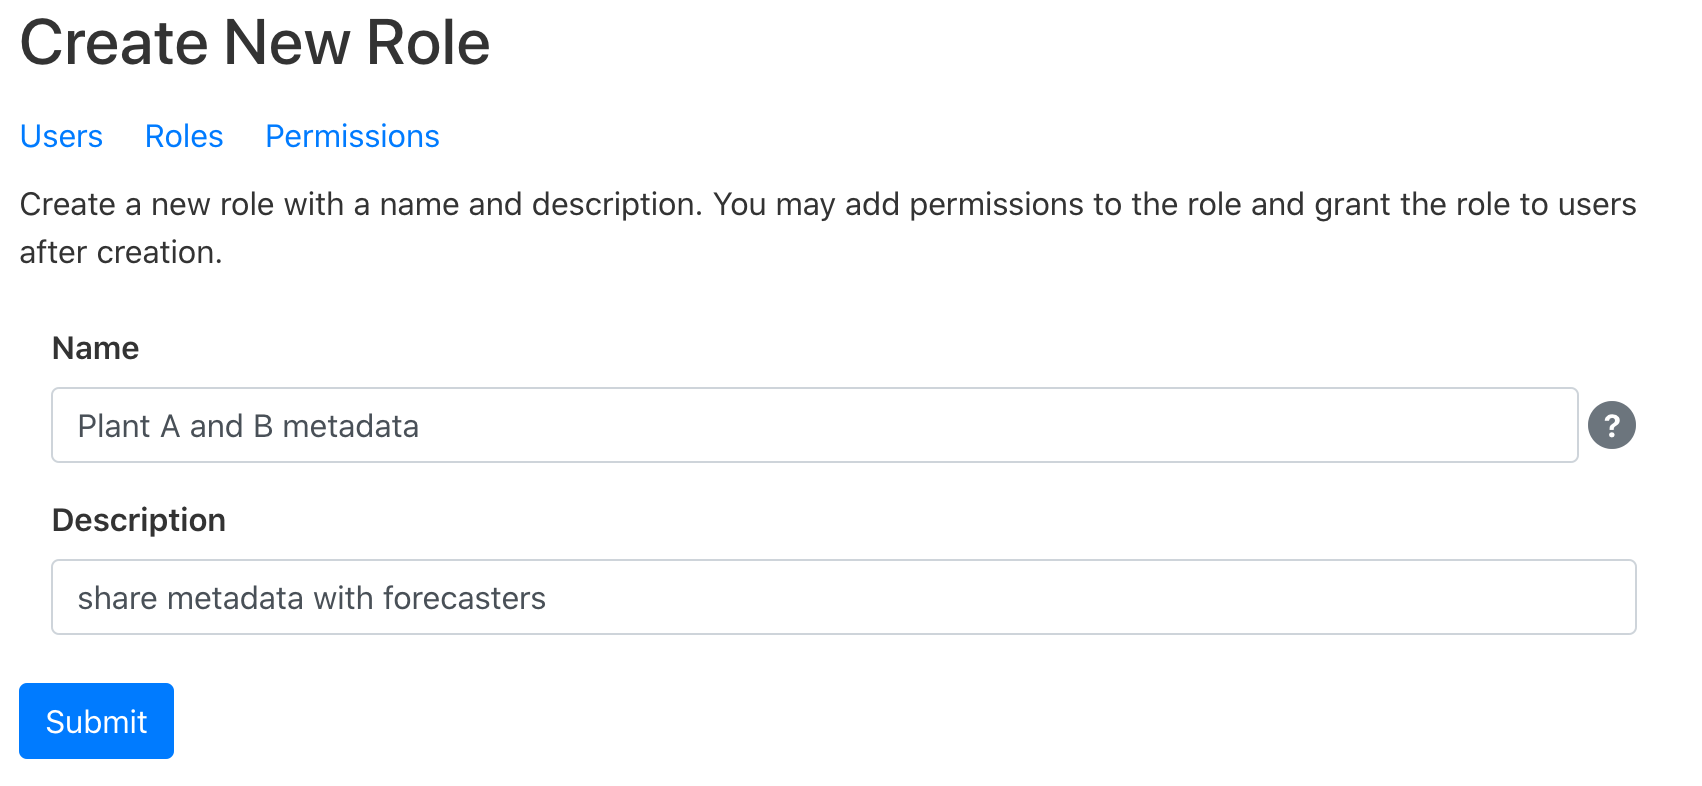
Click the Create new Role button. Complete the form with a name and description of the role. After the role is created you may add permissions to the role or grant it to users.
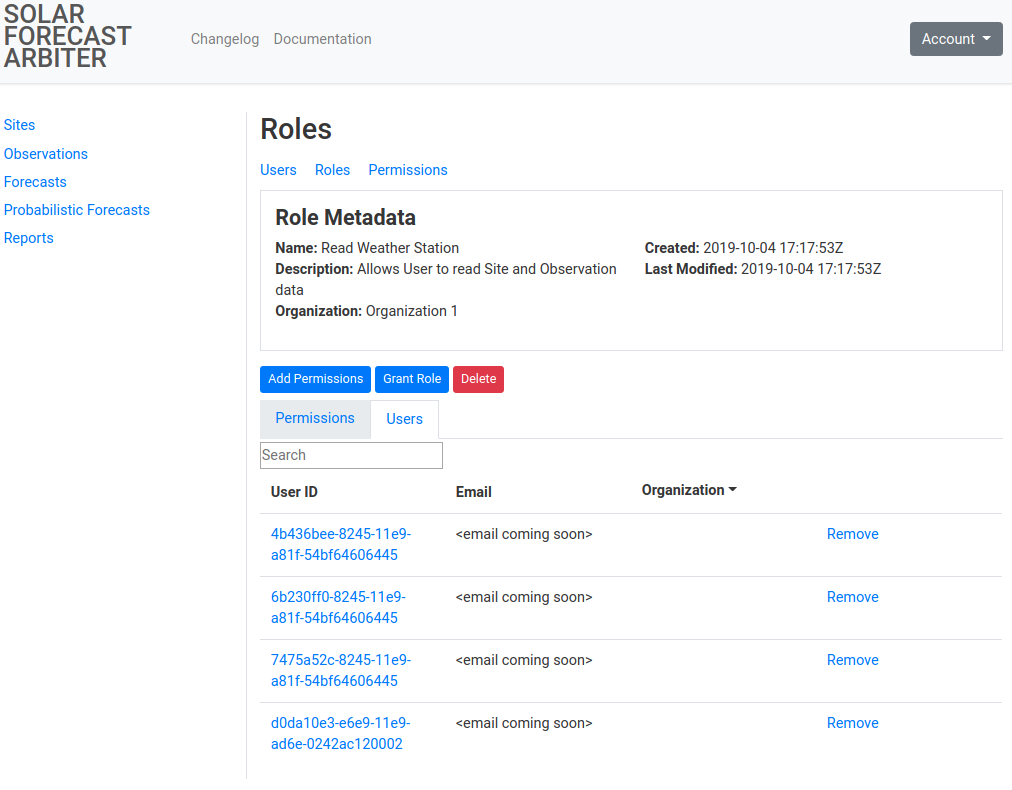
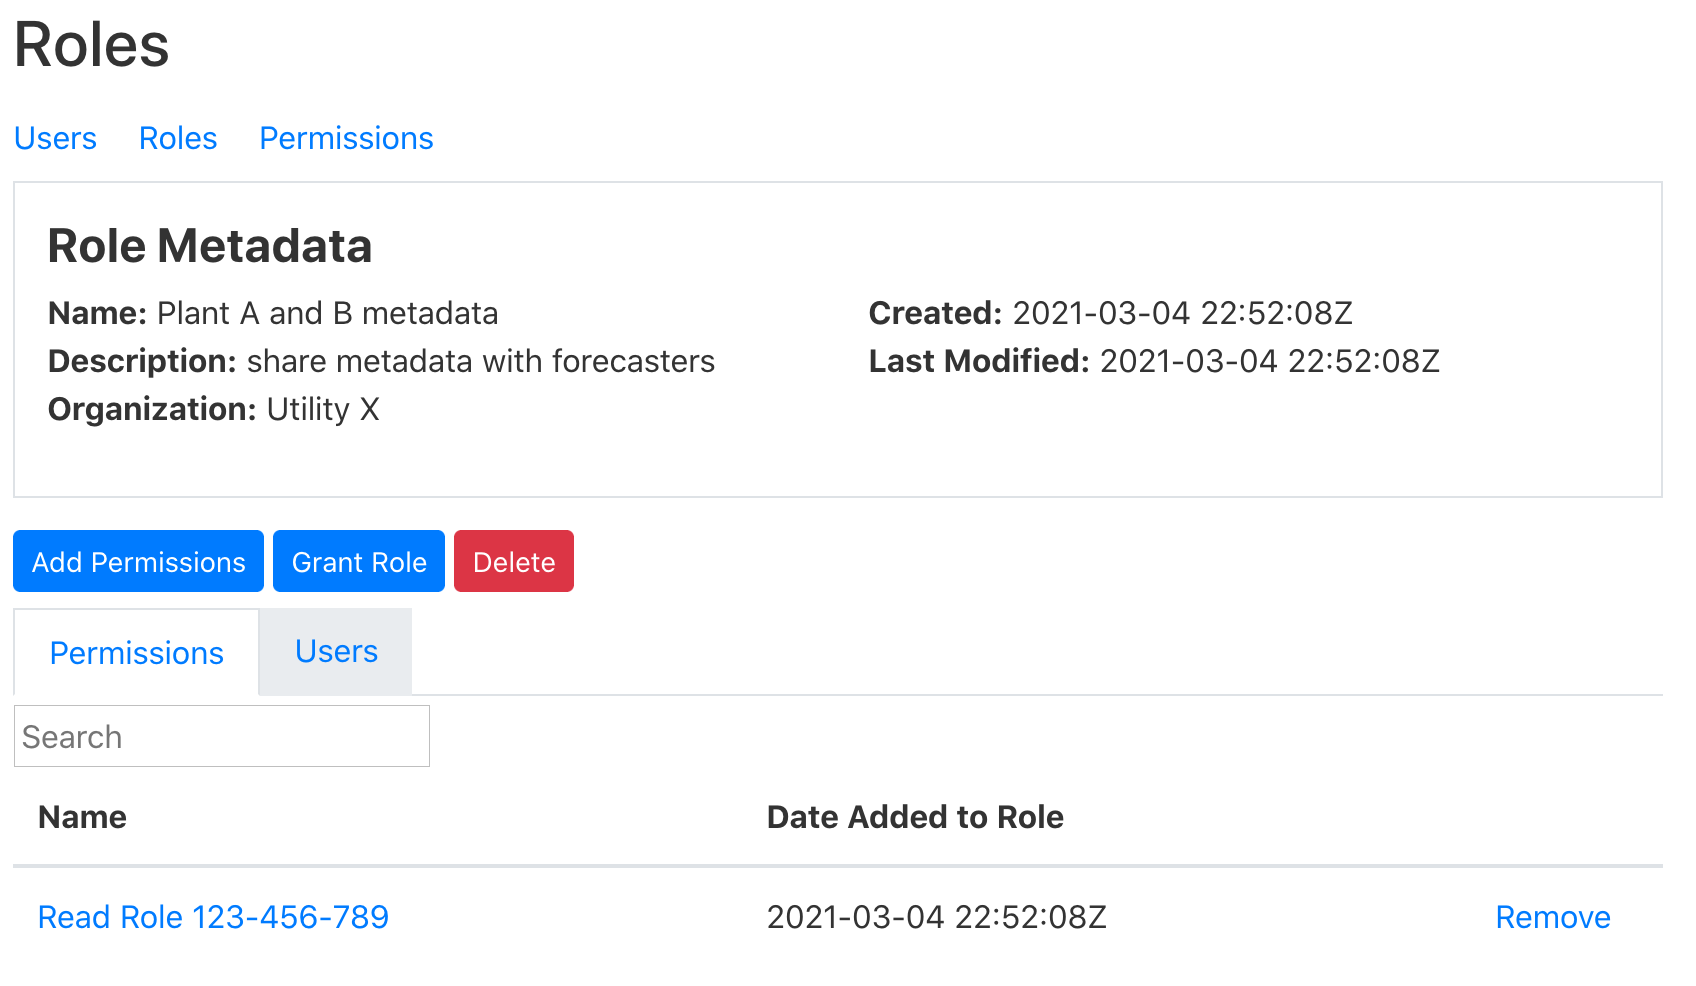
Clicking on an individual Role will list information about it and the permissions associated with it. Use the tabs below the metadata section to switch between the list of permissions on the role and a list of users the role has been granted to.
Role permissions listing
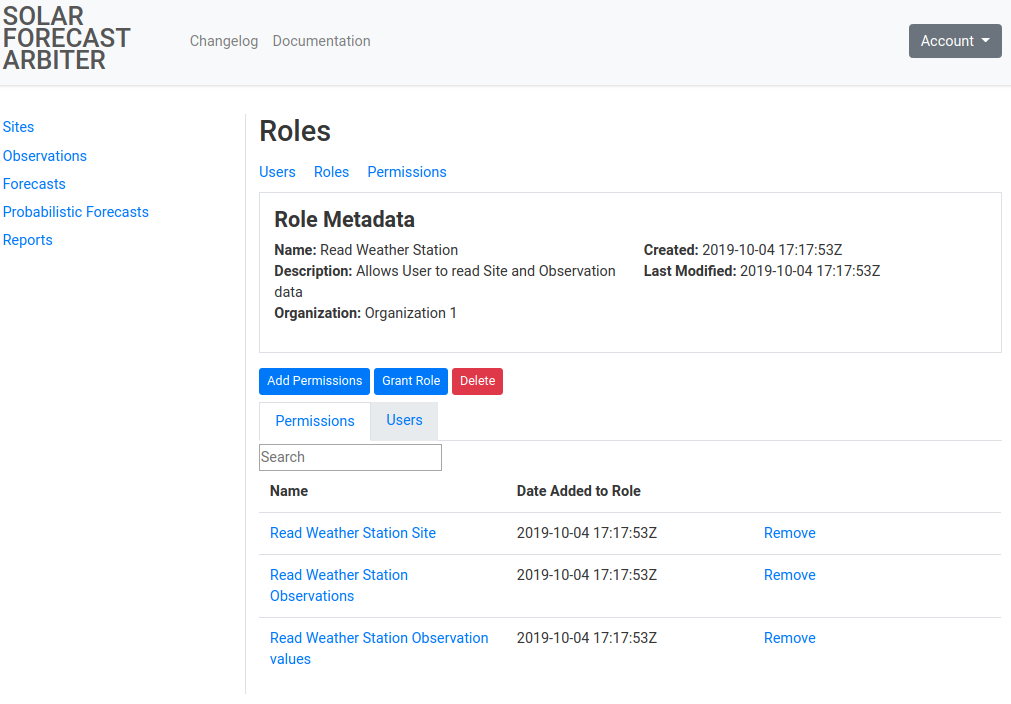
Role users listing
Grant and Revoke Roles
To give users permissions on data, an administrator grants a role to a user that contains the relevant permissions. Users may be granted multiple roles. Administrators may also revoke roles to remove the ability of a user to interact with data.
Grant Roles to a User
Organization administrators may grant roles to other users through several interfaces.
All Users
Roles can be any granted to any user, including those outside your organization, through the role administration interface.
-
Navigate to the Role you would like to grant to a user. Click the Grant Role button.
-
Enter the email of the user to grant the role to and click submit.
Users within your organization
Roles may be granted to users within your organization through the user administration interface.
-
Navigate to the User for which you would like to grant permissions and click the Add Roles button.
-
This page will list each role that is not already granted to the user. Check the box for each role to add to the user and submit the form. You will be returned to the user’s page.
Revoke Roles from a User
Organization administrators may revoke roles to other users through several interfaces.
All Users
Roles can be any removed from any user, including those outside your organization, through the role administration interface.
-
Navigate to the Role you would like to revoke from a user and click on the Users tab.
-
Locate the user in the users table and click the remove link in the far right column. You will be presented with a confirmation page before the role is removed from the user.
Users within your organization
Roles may be revoked from users within your organization through the user administration interface.
-
Navigate to the User you would like to revoke a role from.
-
Locate the Role to revoke in the roles table, and click the remove link in the far right column. You will be presented with a confirmation page before the role is removed from the user.
Modify Role
Permissions may be added to or removed from an existing role. Administrative permissions may not be added to a role that is currently shared with a user outside the organization.
Add Permissions to a Role
-
Navigate to the Role you would like to add permissions to and click the add permissions button.
-
Check the box for each permission to add to the role and click submit.
Remove Permissions from a Role
-
Navigate to the Role you would like to remove Permissions from and click on the Permissions tab.
-
Locate the Permission to revoke in the table and click the remove link in the far right column. You will be presented with a confirmation page before the permission is removed from a role.
User Classifications
Users of the Solar Forecast Arbiter are described by one or more of the following classifications.
Organization Administrators
Organization Administrators are users with roles that allow them to manage users, roles and permissions. Organization administrators are also granted read and write access to all of their organization’s data. Administrators may grant and revoke roles from users in their organization. They may also add or remove permissions from roles.
Administrators may grant roles to members of other organizations. The Solar Forecast Arbiter will reject any attempt to grant roles to users that are not affiliated with an organization (i.e. their employer has not signed the platform Data Use Agreement).
An organization’s point of contact may request that users in their organization be promoted to an organization administrator by emailing a request to admin@solarforecastarbiter.org.
Standard Users
Solar Forecast Arbiter users are added to the Unaffiliated organization by default. Unaffiliated users will have access to the reference data set but may not gain further access until they have joined an organization that has accepted the data use agreement.
An organization’s point of contact may submit a request to admin@solarforecastarbiter.org to add a user to their organization. Users new to an organization have no access to the organization’s data until an organization administrator grants them access.
Organization Point of Contact
An organization’s point of contact is a representative of the organization who is authorized to approve or request changes to the organization. There may be more than one point of contact for an organization.
A point of contact may coordinate with framework administrators to:
- Add and remove users from the organization.
- Promote users to organization administrators.
- Coordinate organization participation in a forecast trial.
Managing Organizations and Users
Create New Organization
To create an organization, a company must first sign the Data Use Agreement and provide it to the Solar Forecast Arbiter administrators. The Arbiter administrators will then create the organization.
Affiliate User with Organization
Users that are not affiliated with an organization only have the permissions necessary the browse the reference data set. They cannot create new metadata or upload data. Nor are they allowed to see data shared by other users.
To affiliate a new user with an organization, the user or the organization’s point of contact must email admin@solarforecastarbiter.org with the request. The Solar Forecast Arbiter administrators will only affiliate a user with an organization with the approval of the organization’s point of contact.
Managing Users
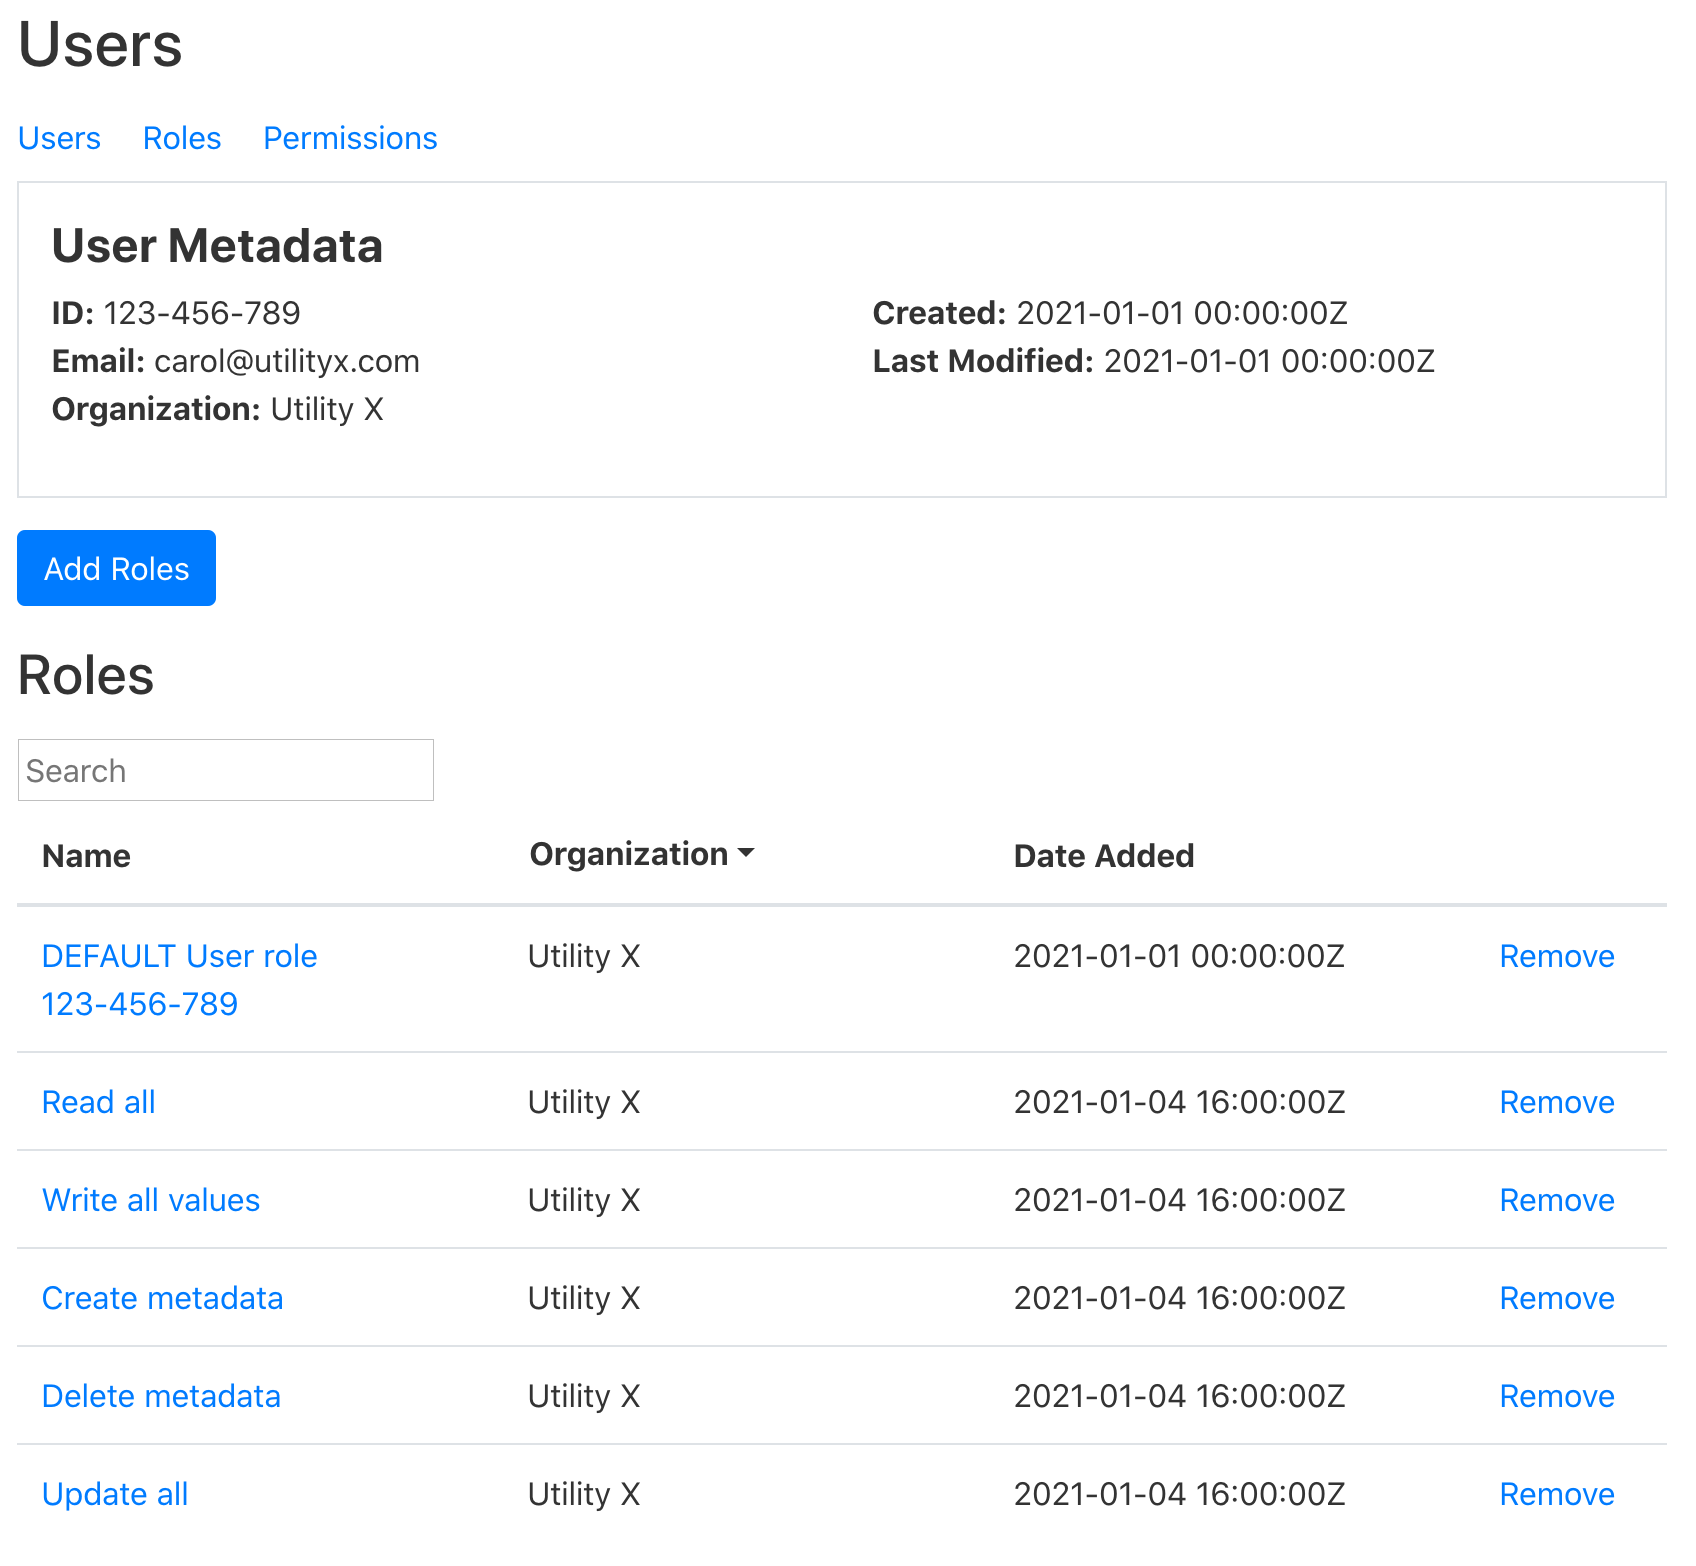
Users are associated with an organization through the signup process outlined in getting started. Administrators have access to a listing of users in their organization and a page for each individual user in their organization and the roles they have been granted.
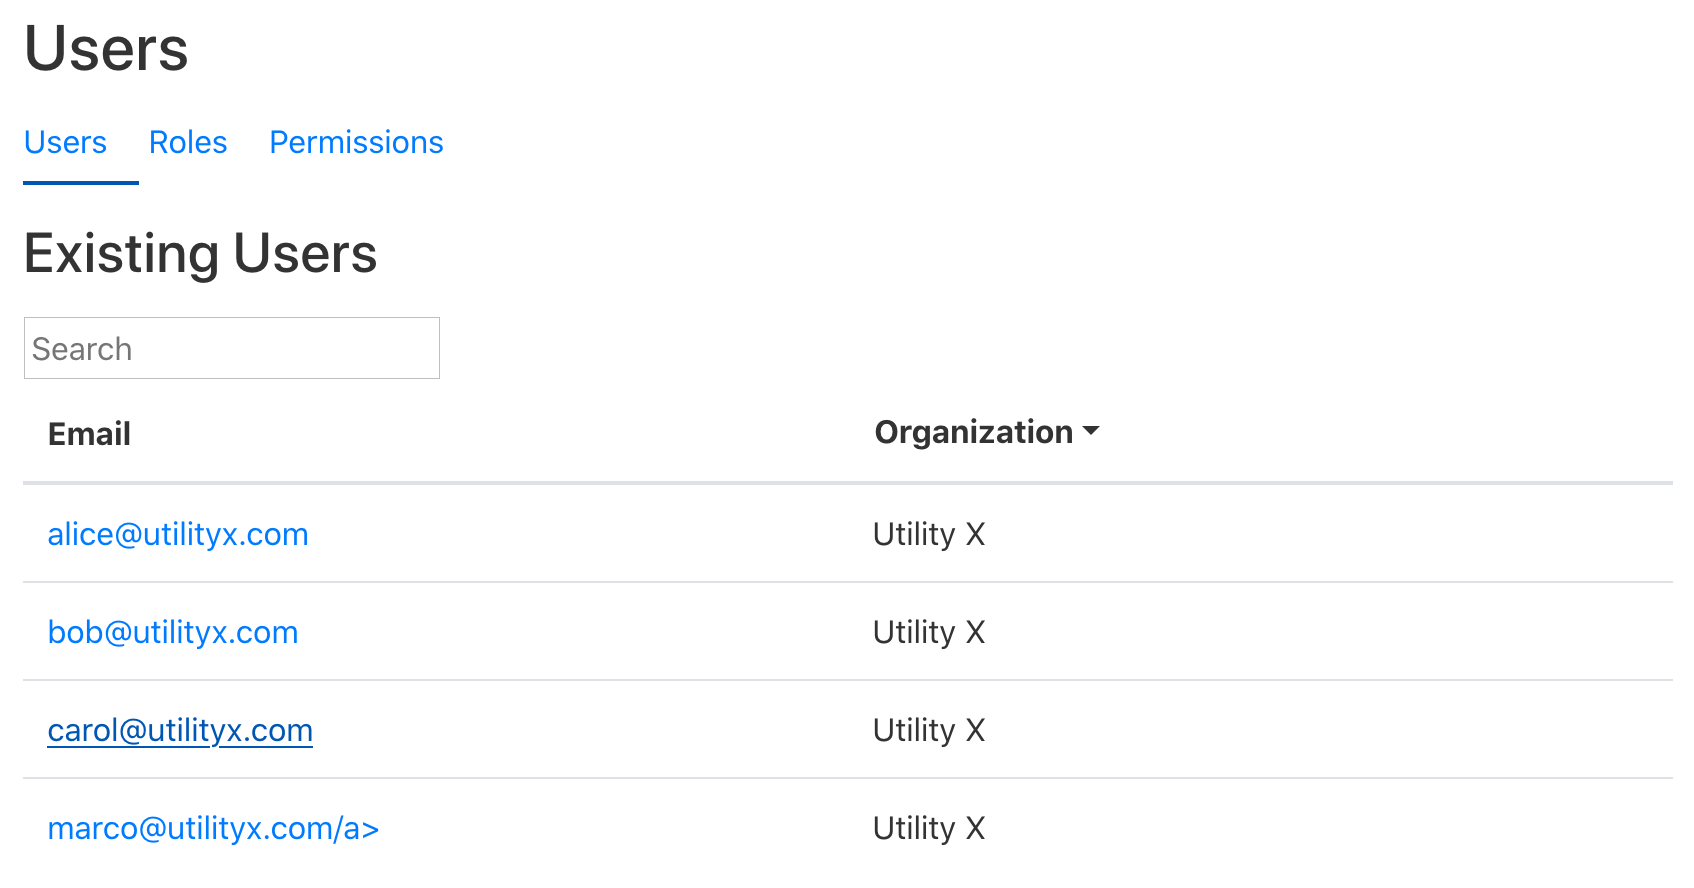
-
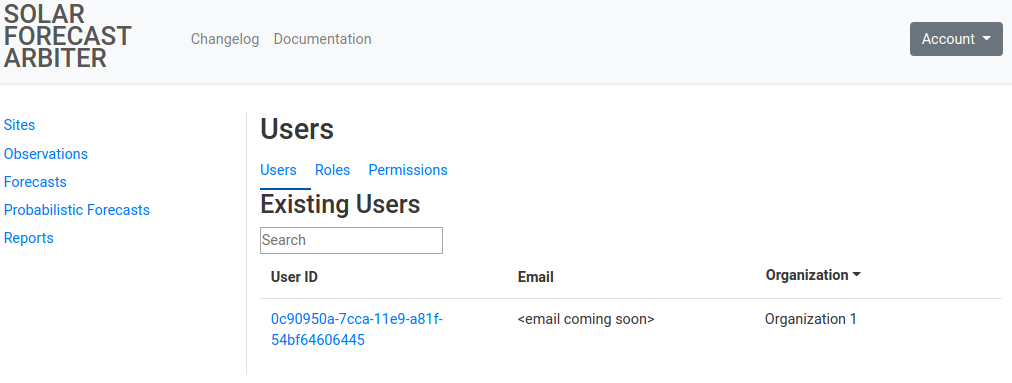
The Users tab of the user administration menu will list the users you have access to administer(users within your organization) or view (users outside your organization that have been granted access to your data).
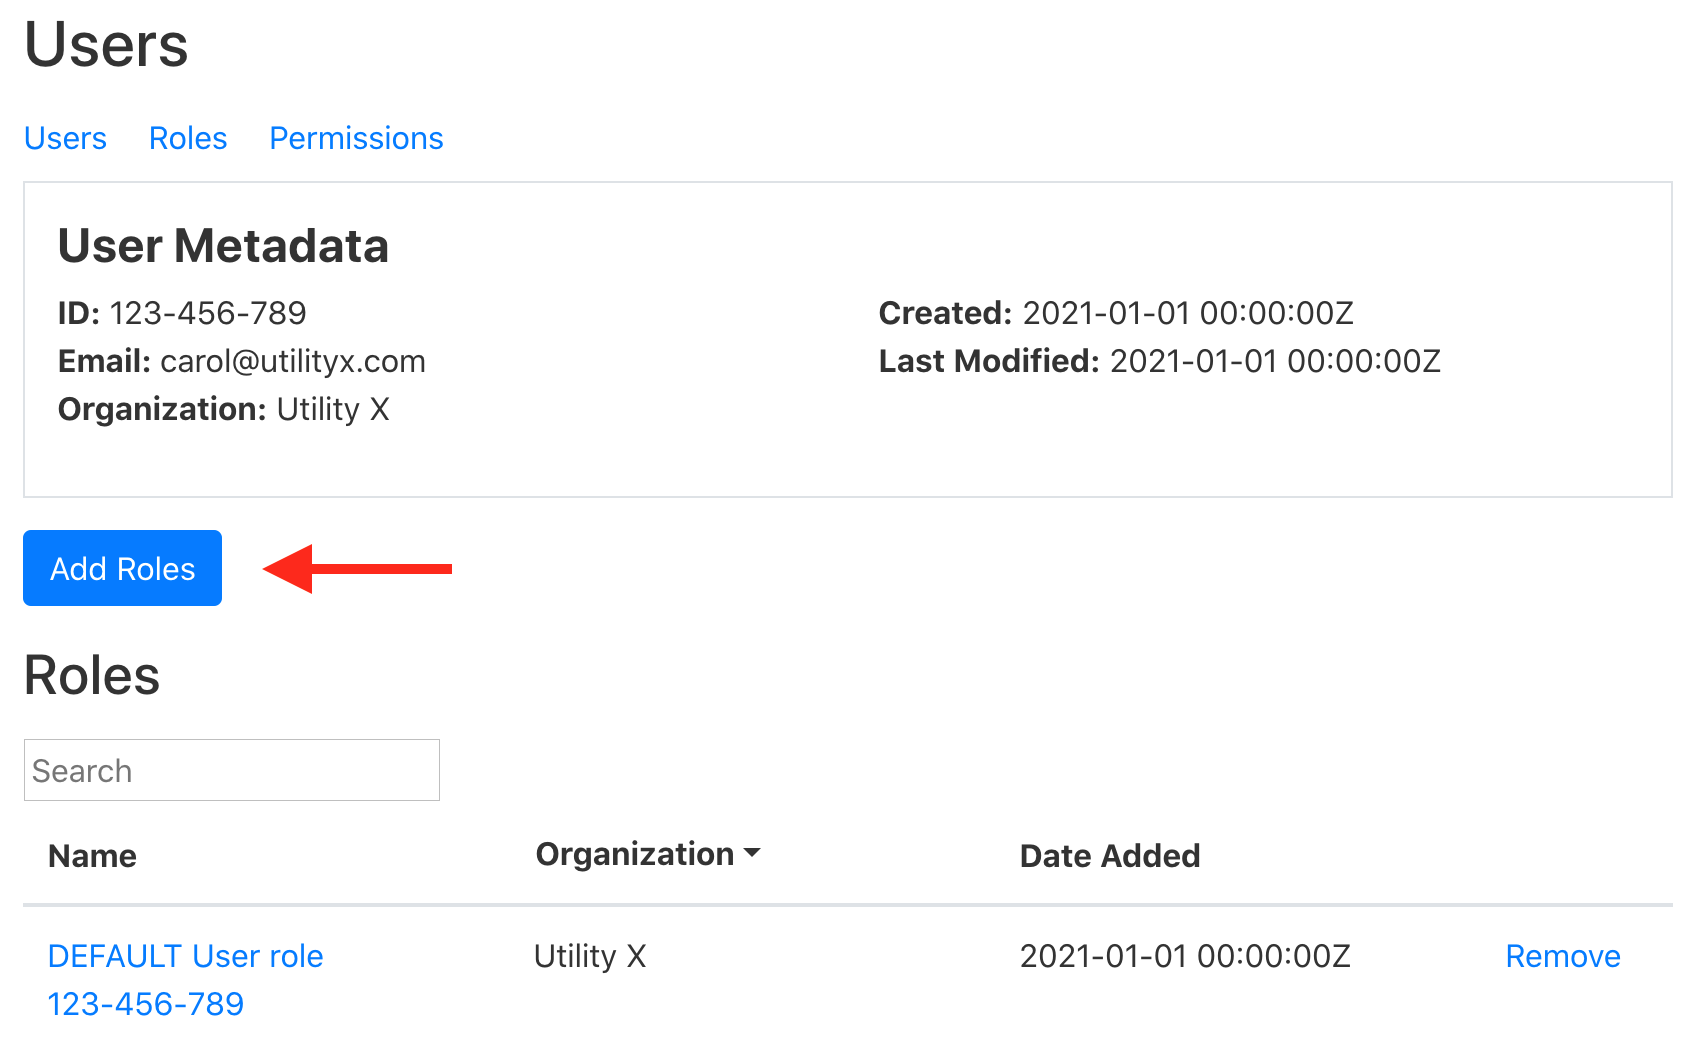
-
Clicking on an individual user will list information about the user and their roles. See the users within your organization section of granting roles to a user and revoking roles from a user for how to manage a user’s roles.

Examples
The following examples illustrate how to apply the Solar Forecast Arbiter’s role based access control to common situations. Modify them to suit your specific application.
Set up a New Organization
Analyst Alice at Utility X wants to use the Solar Forecast Arbiter. She creates an individual user account and browses the reference sites, forecasts, and reports. Now she wants to upload data and analyze her own forecasts. To do this she’ll need someone from her organization to sign the Data Use Agreement that protects the data rights of her organization and limits the liability of the Arbiter operator, the University of Arizona.
Alice downloads the Data Use Agreement and provides it to her legal team. Alice reminds her legal team that the DUA is not negotiable, but dozens of well-known entities have signed the agreement.
The legal team signs the agreement and Alice emails it to admin@solarforecastarbiter.org. The Arbiter administrators ask Alice:
- What should the name of the organization be? Users will see this name next to any data shared by the company.
- Who will be the organization point of contact? This person will approve all changes to the list of users associated with the organization and will be contacted should any issue arise.
- Which users should be organization administrators?
- Which users should be standard users?
Alice responds that name of name of the organization will be Utility X, she will be the point of contact, both she and bob@utilityx.com will be administrators, and finally carol@utilityx.com will be a standard user. They also might want to add additional administrators and standard users at a later date.
The Arbiter administrators set up the organization as requested and inform Alice that they’re all set to use the Arbiter for their own analyses and it’s no problem to add additional users at a later date.
Alice logs into the Arbiter and now sees buttons for creating new sites, observations, forecasts, aggregates, and reports.
Roles within an Organization
Alice is an administrator of the Utility X organization within the Solar Forecast Arbiter. She needs to set up data access for a couple of her team members:
- Carol needs to upload data, create reports, etc.
- Marco needs to review data and reports, but does not need an ability to upload data.
These permissions will apply to all current and future data within the organization, so Alice can use the Arbiter’s preconfigured roles.
- Alice navigates to the user administration page by clicking on the “Account” button in the upper-right corner of any Dashboard page.
- From the user administration page, she clicks on the users
page.
- First Alice sets up the roles for Carol. From the list of users, she clicks
the link for carol@utilityx.com.
- The page shows all of the roles currently granted to carol@utilityx.com.
By default, the only role granted to a standard user is a role that allows
a user to inspect their own metadata. Alice clicks the “Add Roles” button.
- From the list of roles, Alice selects Read all, write all values, create
metadata, delete metadata, update all. She may need to scroll through the
list of roles to find them.
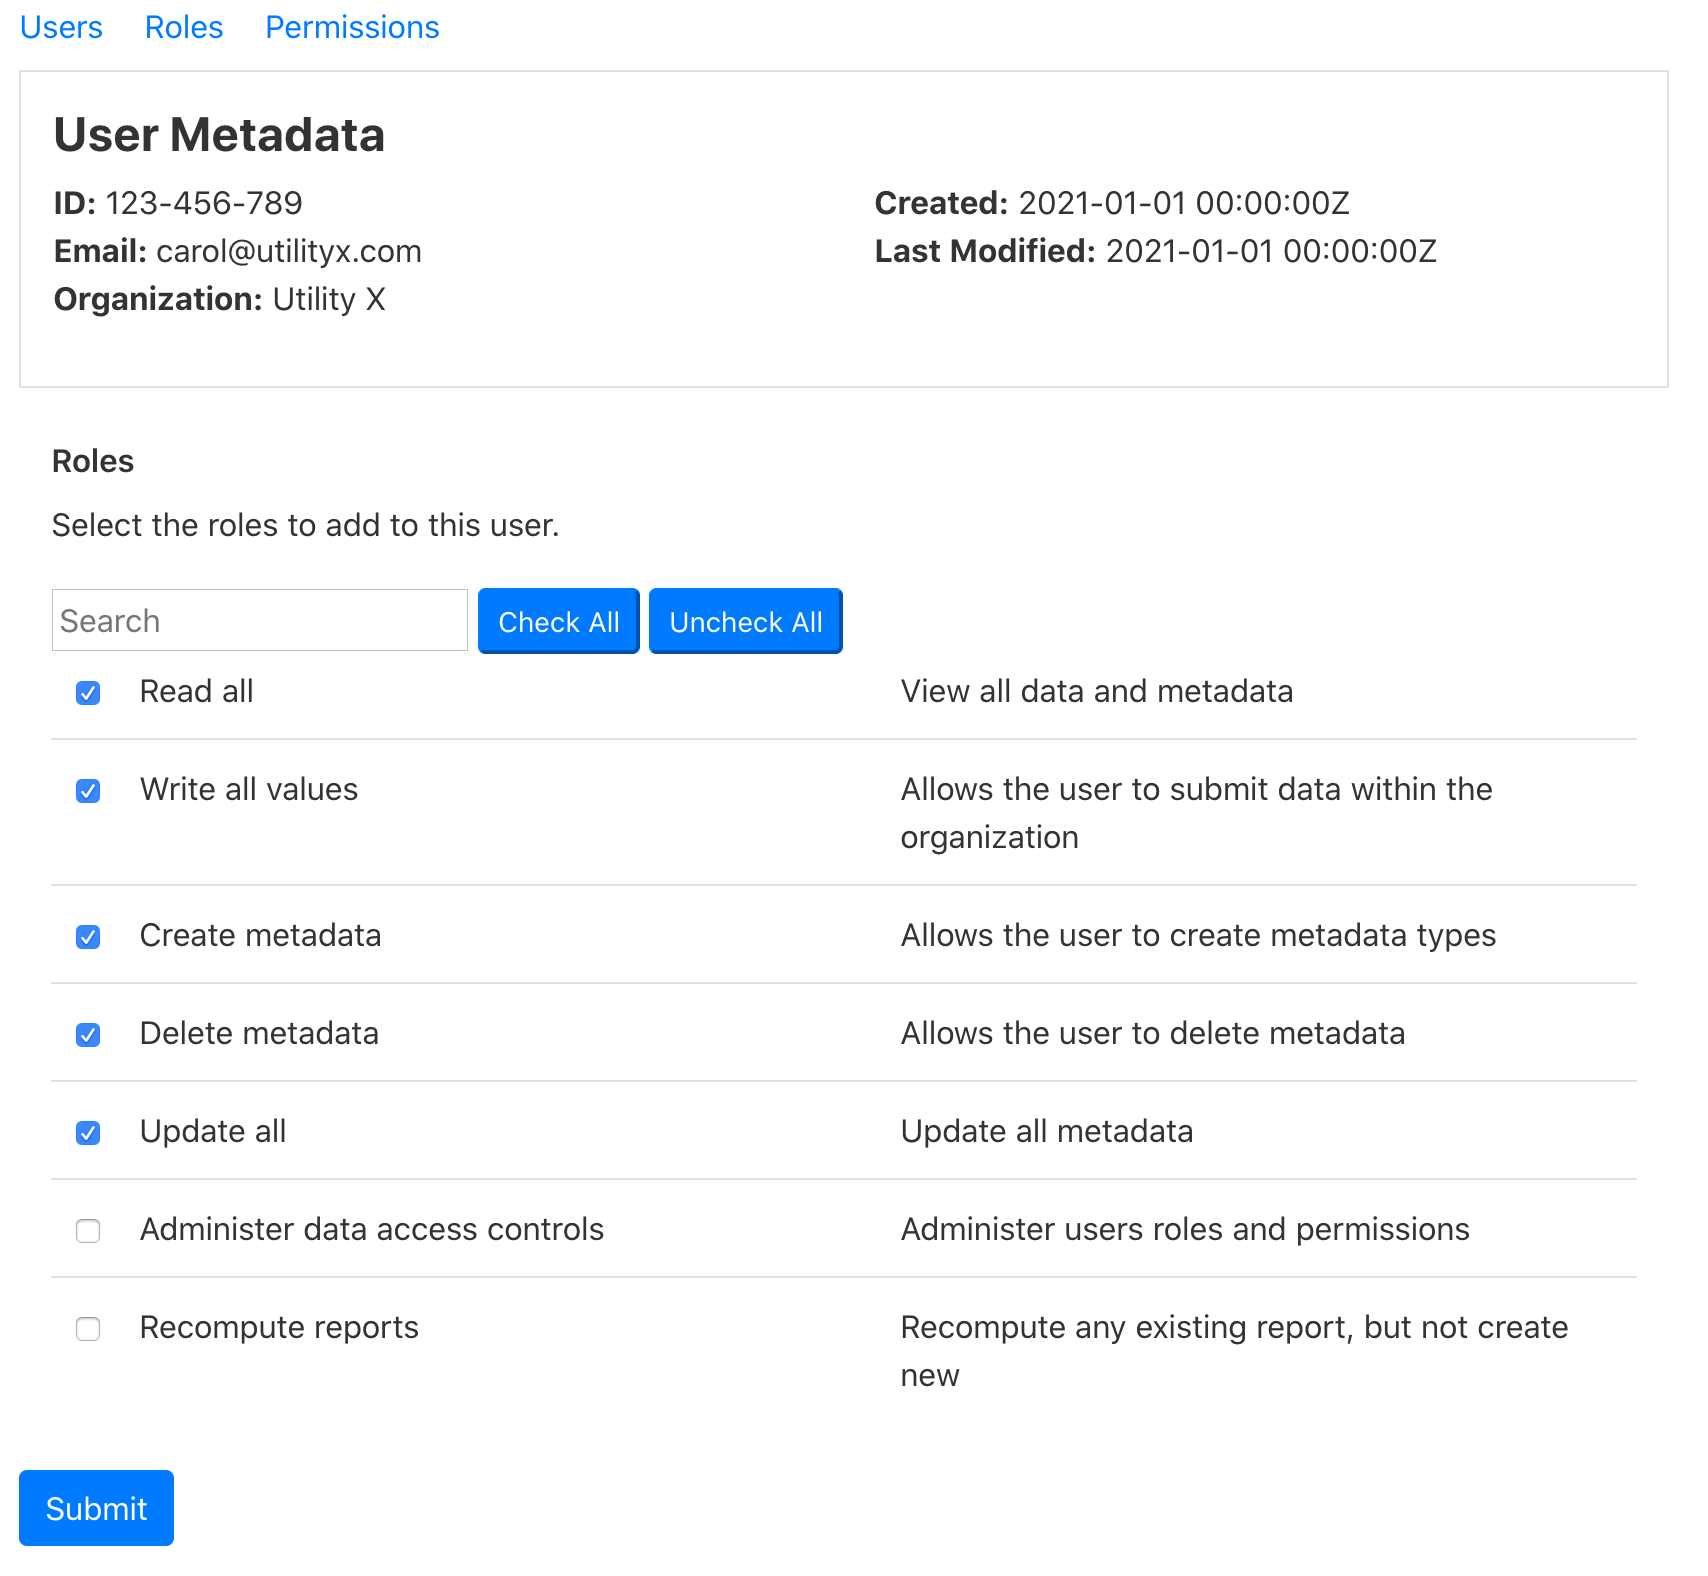
- Alice clicks the “Submit” button and is redirected to the
administrator’s page for carol@utilityx.com. Alice confirms that the list of
roles granted to Carol includes the desired roles.
- Now Alice sets up the roles for Marco. She clicks on the users page once again.
- From the list of users, she selects marco@utilityx.com.
- From the list of roles, she selects only Read all, recompute report.
Carol and Marco now have the intended data access.
Share Site Metadata
Alice at Utility X would like to find vendors to provide forecasts for several solar power plants. She doesn’t yet want to share data - just the metadata.
To share the site metadata, she’ll need to create a role with read permissions for the sites, then grant that role to the interested forecast providers. The steps below illustrate this process.
Create the Permission
- Alice navigates to the user administration page by clicking on the “Account” button in the upper-right corner of any Dashboard page.
- From the user administration page, she clicks on the permissions page.
- Alice sees a list of many permissions that are presupplied to administrators.
At the top of the page she sees the “Create a New Permission” box with
buttons for each data type. She clicks the “Sites” button.
- To create a new permission, Alice provides a description, selects the action
this permission will allow, and then selects the sites the permission will
apply to. She selects Power Plant A and Power Plant B, but chooses not to
include Power Plant C at this time (she can add it to this permission when
she’s ready to share its metadata). Finally, she clicks the Submit button.
- Alice reviews the new permission and notes the button for adding another
object to it will be useful when it comes time to share metadata for Power
Plant C.
Create the Role
Now Alice is ready to create a new role and add the new permission to it.
- From any dashboard administration page, she clicks on the link to the roles page.
- Once on the roles page, she clicks the “Create new Role” button.
- Alice gives the new role a name and an optional description and clicks
Submit.
- Alice now sees the administration page for her new role. She notes that it
contains a default permission that gives her the ability to view the role.
She clicks the “Add Permissions” button.
- Alice searches for the “Read plant A and B” permission that she created a few minutes ago, selects it, and clicks submit.
Grant the Role
Finally, Alice is ready to grant the role to other users, thus giving them the permission to view the Power Plant A and Power Plant B sites.
- Alice is already on the administration page for the “Plant A and B metadata” role, so she goes ahead and clicks the “Grant Role” button. If she happened to have navigated away in the meantime, she could find it again through the roles administration page.
- On the grant roles page, Alice enters the email address for the first user she wants to share the data with and clicks “Grant Role”. She repeats this process for any additional forecast providers that she wants to share data with.
The forecast providers can now see these power power plants on the Sites page. They’ll easily find the new power plants if they click the “Provider” button and deselect the Reference data set.
The Solar Forecast Arbiter does not alert users when new roles are granted to them, so Alice should let the other users know the data is now available to them.
What would happen if Alice defines a new observation, such as AC power, and uploads the time series data? Will the forecast providers be able to see it? No. While that could be convenient in some circumstances, it could also pose a data security risk in other situations. Alice can define new observations or forecasts at these sites, or use them in a report, without any fear of data becoming visible to the forecast providers. Only the site metadata will be visible to the providers. If Alice wants to share additional metadata and data with the forecast providers, she’ll need to add new permissions to the existing role or she’ll need to create new roles and grant them to the providers.
Share a Forecast and Report
Vera at Forecaster Alpha thinks that Alice at Utility X could benefit from their forecasts. A good way to demonstrate skill is to compare a proprietary or test forecast to the Solar Forecast Arbiter’s reference forecasts. The Solar Forecast Arbiter provides reference forecasts for sites all across the country, so it’s likely that Vera can find a reasonable reference forecast within the service territory of Utility X. The Solar Forecast Arbiter also classifies sites into climate zones, so Vera could instead select a site in the same climate zone as Utility X. The step by step instructions are:
Create forecast and report
First Vera needs to create a forecast and a report to share.
- Vera navigates to Solar Forecast Arbiter’s reference data
map and climate zone
map. Vera wishes the Arbiter
developers had integrated both of these maps into the Dashboard, but also
understands that the developers had to make hard choices about what to
prioritize.
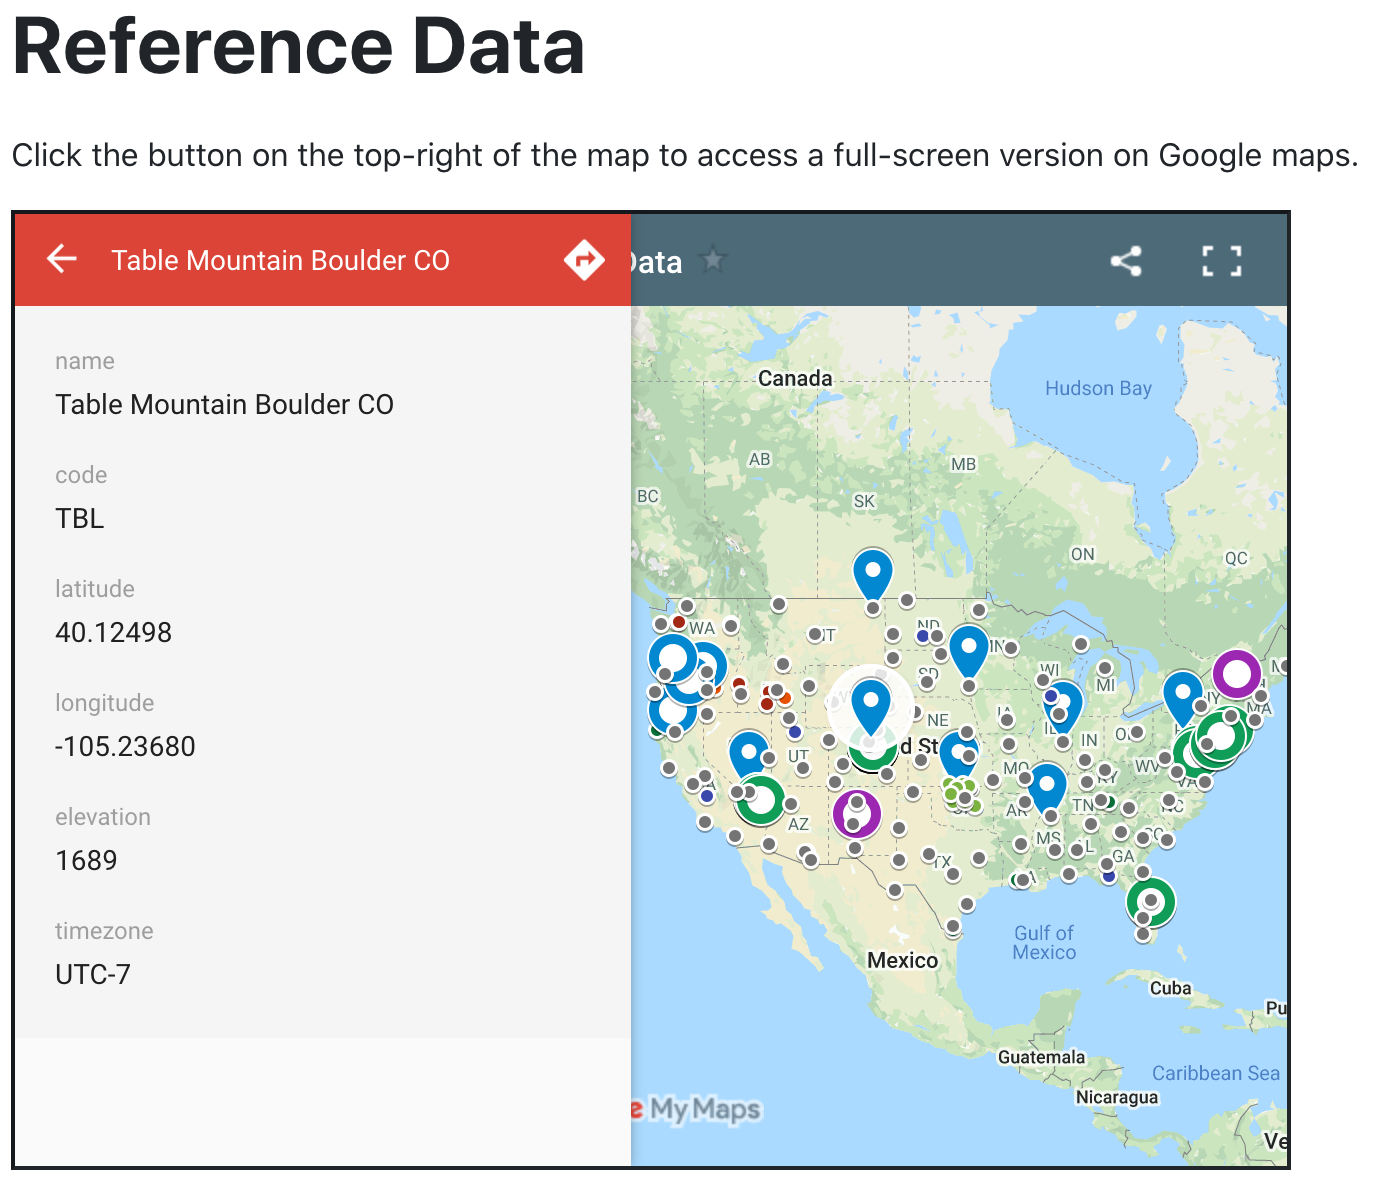
- Vera decides to use the NOAA SURFRAD Table Mountain site. She reviews the reference forecasts available under the site’s forecast menu and in the nightly updated reports.
- From the site page, Vera clicks the “Create new Forecast” button. She chooses parameters that will make her forecast reasonably consistent with one of the reference forecasts, names it “Alpha Day Ahead” and clicks submit. This forecast is only viewable by her (and perhaps others within the Forecast Alpha organization). It is not viewable by any other users even though it was created at a public reference site.
- Vera uploads time series data to forecast. Again, the data is only viewable by her.
- Vera creates a new report, “Alpha Day Ahead vs. Reference”, selecting her forecast and selecting the Arbiter’s forecast as a reference forecast. She also double checks that the skill metric is selected.
Create Permissions
Now that she has a report to share, Vera is ready to set up the role based access control for Alice at Utility X. Vera knows that she wants to share the forecast metadata and the metrics. She’s not yet ready to share the time series data, but thinks she’ll do that soon. So, she’ll go ahead and set up read permissions for the forecast metadata, the forecast values, the report, and the report values.
- Vera navigates to the user administration page by clicking on the “Account” button in the upper-right corner of any Dashboard page.
- From the user administration page, she clicks on the permissions page.
- First she creates the permission to read the forecast metadata.
- She clicks the “Forecasts” button within the “Create a New Permission” box.
- She provides a description of the permission, “Utility X Read Forecasts”, selects the “Read” action, and selects the “Alpha Day Ahead” forecast she previously created, and clicks submit.
- Next she creates the permission to read the forecast values.
- She clicks the “Forecasts” button within the “Create a New Permission” box.
- She provides a description of the permission, “Utility X Read Forecast Values”, selects the “Read Values” action, and selects the “Alpha Day Ahead” forecast she previously created, and clicks submit.
- Finally, she creates the permissions to read the report.
- She clicks the “Report” button within the “Create a New Permission” box.
- She provides a description of the permission, “Utility X Read Report”, selects the “Read” action, and selects the “Alpha Day Ahead vs. Reference” report she previously created, and clicks submit. This will give a user the ability to read the report metadata, such as start, end, and metric types.
- She repeats the process for the “Read Values” permission on the report. This will give a user the ability to read the report results, most importantly the metric values. It will not give the ability to read the time series values of a forecast or observation.
Create Role
It’s now time for Vera to collect the new permissions into a role.
- From any dashboard administration page, she clicks on the link to the roles page.
- Once on the roles page, she clicks the “Create new Role” button.
- Vera gives the role a name, “Utility X”, an optional description, and clicks Submit.
- Vera clicks the “Add Permissions” button.
- Vera selects the “Utility X Read Forecasts”, “Utility X Read Report”, and “Utility X Read Report Values” permissions. She does not select the “Utility X Read Forecast Values” permission.
Grant Role
Vera can now grant the role to Alice so that she can review the report.
- From the administration page for the “Utility X” role, Vera clicks the “Grant Role” button.
- Vera enters Alice’s email address and clicks “Grant Role”.
Alice can now review the report, but the report will not contain the time series values. Alice can also find a link to the forecast metadata by navigating to the list of forecasts at the Table Mountain site.
Modify Role
Alice is intrigued by the forecast performance and wants to see the time series values to get a better understanding of the forecast. Utility X and Forecaster Alpha work out their own non-disclosure agreement independenly of the Solar Forecast Arbiter. Vera can now share the time series data with Alice.
- Vera navigates to the roles administration page and clicks on the “Utility X” role.
- Vera clicks the “Add Permissions” button.
- Vera selects the “Utility X Read Forecast Values” permission that she previously created and clicks Submit.
Alice can now see the forecast values in the report. She can also view or download the forecast values from the forecast page associated with the Table Mountain site.
Permissions Reference Table
This table gives a brief description of the effect of each type of permission on each data type. In certain circumstances, a combination of permissions may be necessary to perform a particular action.
| Data Type | create1 | read | update | delete2 | read_values | write_values | delete_values | grant | revoke |
|---|---|---|---|---|---|---|---|---|---|
| sites | create new | read metadata | update all metadata | delete metadata3 | n/a | n/a | n/a | n/a | n/a |
| observations | create new | read metadata | update name, uncertainty, and extra parameters | delete metadata and values | read timeseries values and quality flags | add timeseries values to observation | n/a | n/a | n/a |
| forecasts | create new | read metadata | update name and extra parameters | delete metadata and values | read timeseries values | add timeseries values to forecast | n/a | n/a | n/a |
| cdf_forecasts | create new 4 | read metadata | update name and extra parameters | delete metadata and values | read timeseries values of each bin | add timeseries values to bins | n/a | n/a | n/a |
| aggregates | create new 5 | read metadata | update name, description, timezone, extra parameters and add or remove observation from aggregate 6 | delete metadata and values | read timeseries values 7 | n/a | n/a | n/a | n/a |
| reports | create new | read metadata | set report status, store report metrics and raw_report | delete metadata and values | read processed values of report | store or update processed report values | n/a | n/a | n/a |
| users | create new | read metadata | n/a | delete metadata | n/a | n/a | n/a | n/a | n/a |
| roles | create new | read metadata | add and remove permissions from role | delete metadata | n/a | n/a | n/a | add role to user | remove role from user |
| permissions | create new | read metadata | add and remove objects from permissions | delete metadata | n/a | n/a | n/a | n/a | n/a |
-
Create permissions are only effective within the organization that they are created. When users create metadata, the metadata is owned by that user’s organization. User’s that are granted
createpermissions outside their organization will not be allowed to create new metadata, they will requirecreatepermissions from their own organization. -
Deleting any data type will remove that object from all permissions that affect it.
-
All of a site’s forecasts and observations must be deleted before the site can be deleted.
-
The creation of a probabilistic forecast (cdf_forecast) requires both the
createandupdatepermission. -
The creation of an aggregate requires the
createpermission to create an empty aggregate, and theupdate permissionto add the observations that make up the aggregate. -
Adding an observation to an aggregate requires that the user has
readpermissions on that observation. -
Reading the full values of an aggregate requires
read_valuespermissions on all of it’s constituent observations. A partial aggregate value will be returned to users.
To prevent adminstrators of one organization from administering another organization, many permissions related to the administration of users, roles, and permissions are restricted to users within the same organization. For example, attempts to grant a role with permission to update users to a member of another organization or to add the update users permission to a role that has been granted outside the organization will not be allowed. Specifically, create, update, grant, revoke or delete on users, roles, or permissions, are restricted to users in the same organization.